First fix carpentry, plumbing and electrics

In this section we describe the ‘first fix’ structural carpentry and plumbing and electrical work, that is the work done wall plastering. Certainly, in terms of the stud work for the internal walls, this is when we began to see how the rooms – and thus our home – would look.
Stud work for internal walls
In an oak frame house such as ours none of the internal walls are load bearing (this is achieved with the oak frame itself) providing great flexibility for internal room layout. For example, we chose to have an open plan L-shaped kitchen, dining area and lounge rather than three separate rectangular rooms. And, with a Welsh dresser as a room divider, we ‘stole’ a bit of the dining room to extend the kitchen worktop area, with the added benefit of making the areas less boxy.
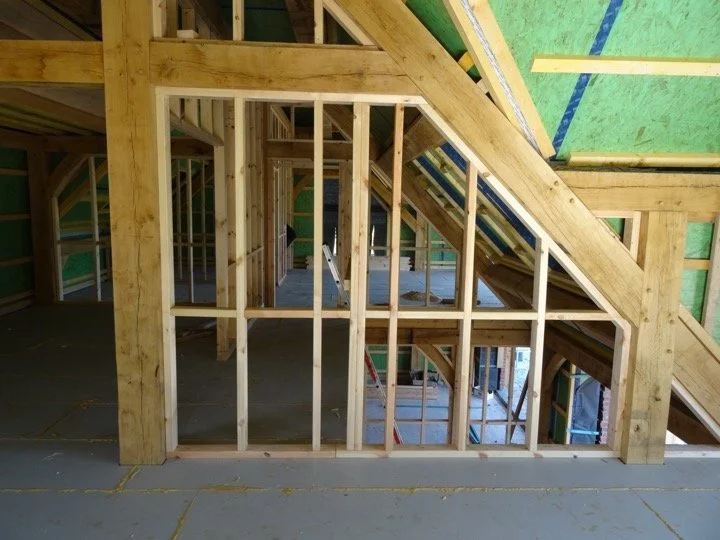
The picture below shows part of the upper floor (on the left looking at the lounge wall and through to the double-height hall, and, on the right looking into what was to become the kitchen, with the dining room beyond and the lounge to its left).

The picture below shows studwork creating the master bedroom en-suite bathroom and, partially visible to its right, the dressing room.

Also shown in this picture is metal frame for a pocket door into the en-suite bathroom; we used these for a number of rooms, and, having looked at different types at various exhibitions, chose the Eclisse system . Pocket doors fit into standard-thickness stud walls, replacing the woodwork; the plasterboard being fixed direct to the frame. An obvious advantage of a pocket door is the space it saves and, because the frame can take standard doors, the same style doors can be used throughout a house. A slight disadvantage of a pocket door is that the wall covering the frame is not robust enough for hanging tiles or shelves (the fixings for the latter would, anyway, protrude into the cavity and stop the door from functioning). In the master en-suite bathroom we easily got round this tiling issue: we wanted a niche in the shower for soap and shampoo bottles and so had a small false wall built on the other side of the pocket door wall and tiled over it (described in more detail in another post).
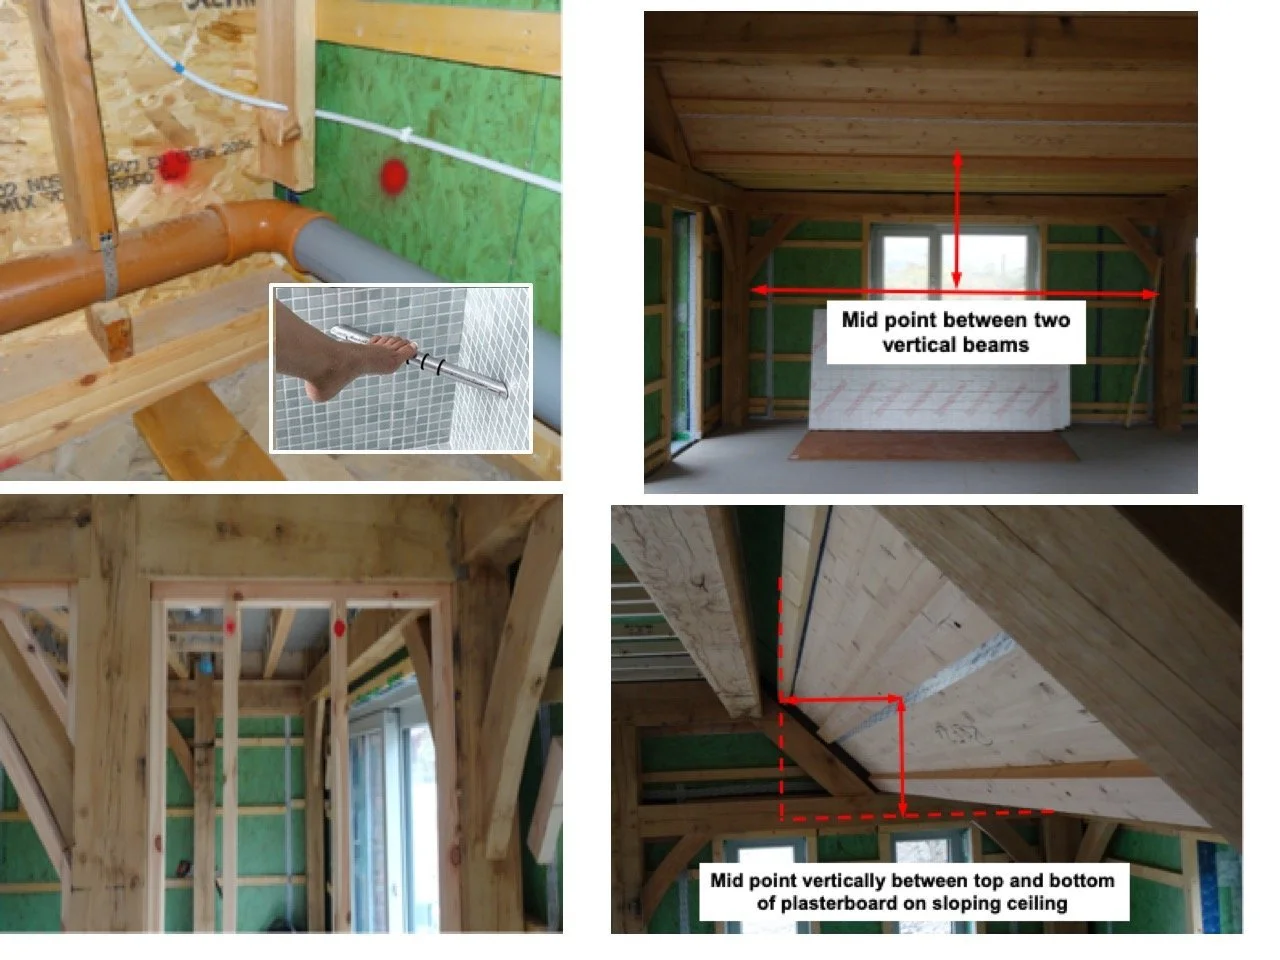
An important job for us at this stage was to identify precisely where we wanted certain things fixed to the walls so that the builders could position additional supporting noggins for them. For example, in the picture below (compiled from an email we sent to our builder) we identified the position of noggins for a shower foot rest (with, inset, an example from a sales brochure) and for some hanging lights.
Plumbing first fix
As with many other aspects of the house build, it was useful to have meetings with the various tradespeople to confirm the precise location of items such as basins, and issues such as wall-hung toilet heights. The latter was important because, whilst there is a standard seat height, with age it is easier to rise from a higher one. Because we hope to be in this house for the rest of our lives, we experimented with different heights and opted for one that was a little above standard.
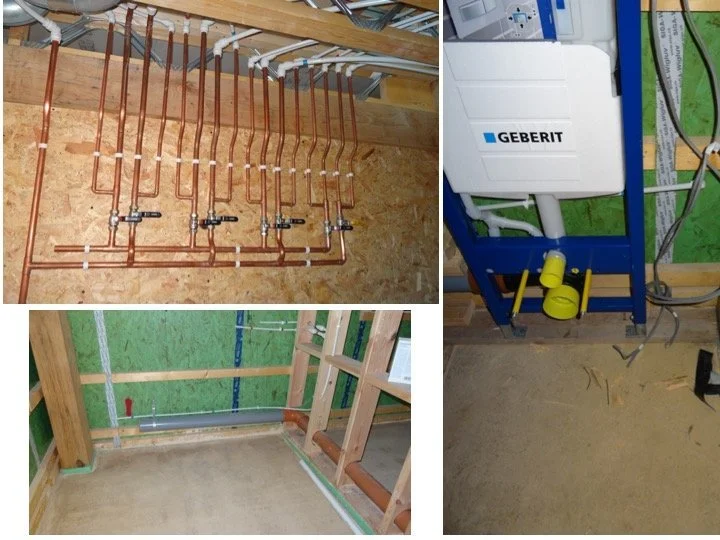
We were also keen to reduce the risk of a loss of water pressure at one outlet when another was opened and our plumber thus created a manifold taking individual pipe runs to each outlet (point-to-point puumbing) rather than the traditional branchings-off from a single feed. This manifold is shown in the top-left image in the picture below.
The top-right image in this picture shows a support frame for one of the wall-hung toilets. These frames, and associated cisterns, are hidden in the walls; finalising what we wanted for the shape and thicknesses of various internal wall was a further role for us at this point.
And another aspect of the stud work for the walls is shown in the bottom-left image of the picture below: using 150mm-wide timbers instead of 100mm means it is easier to locate waste and soil pipes within stud walls (thus avoiding a need for boxing-in) whilst maintaining sufficient structural strength.
Electrical first fix
We believe lighting to be a very important aspect of a home: not only is it practical (so you can see what you are doing) but its style, with variations for different circumstances, is an important component of a home’s ambience, strategically lighting an oak frame is a key aspect of this. This is a link to a BBC video that, we think, discusses the subject of lighting a home well.
Another thing we had to consider at this point, perhaps unexpectedly, was the layout of our furniture because this dictated where many power sockets and TV signal outlets would be sited. This link, to a BBC video in the same series, provides some pointers for this.
We thus spent a long time considering both our lighting and electrical power requirements, and we used the services of a lighting designer at a specialist lighting wholesaler. Whilst the designer incorporated a lot of the things that we had already thought of, he also proposed many ideas that we wouldn’t have thought of and a number of internal and external lighting fixtures that we didn’t know existed. He also identified the appropriate power for the lamps for the fittings as well as the right drivers for particular LED lights. (We chose to have LEDs because they use only about 10% of the electricity of bulbs of similar light output, last much longer than traditional bulbs, and now come in an enormous variety.)
This resulted in pretty complex electrical requirements, especially for lighting, and the use of over two kilometres of cable. The picture below shows some examples of this at the first fix stage: cables are fed through the studwork (for power, lighting and switching circuits), and hung from the ceiling (for downlighters), and they all up in the plant room (bottom centre image) for connection to the consumer units and the light switching system. Many of our lights are operated by wall and keypad switches that use radio signals operating a remote switching system. This means that (i) various combinations of lights can be operated from one or more switches, and (ii) because they are not wired, the switches can be placed anywhere and can be moved easily. We chose to use the Wise system, but there are others.
