Passive House Foundations

All houses need foundations. Passive house foundations need to be highly insulated to reduce heat loss into the ground. And because we were building an oak frame house, our foundations needed to be built as a single concrete slab on top of this insulation.
Introduction
Here we describe the site clearance and the preparation for, and installation of, the reinforced concrete slab foundation with its underlying insulation. All of our building work, ground work and landscaping (except the erection of the oak frame and encapsulation system, and the installation of the ground source heat pump and the windows) was undertaken by FurberYoung Developments Ltd.
Removal of existing foundations and preparation for slab foundation

The site we bought had concrete strip foundations laid for a house planned by the previous owner, part of which can be seen in the picture on the right.
But we needed a slab foundation for our oak frame to stand on with a thick insulating layer of expanded polystyrene foam from Isoquick.co.uk under it to significantly reduce heat loss into the ground and thus help us to achieve the Passivhaus standard.
To avoid ‘hard points’ in the ground under the concrete slab, which could break it with any heave of the underlying clay, these old foundations had to be removed, as shown on the left.
The original 1.7m deep concrete strips were dug out and put to one side and the ground levelled. It was cheaper (and less wasteful) to use a concrete crusher to recycle the old foundations than send them to landfill elsewhere (see pictures below).
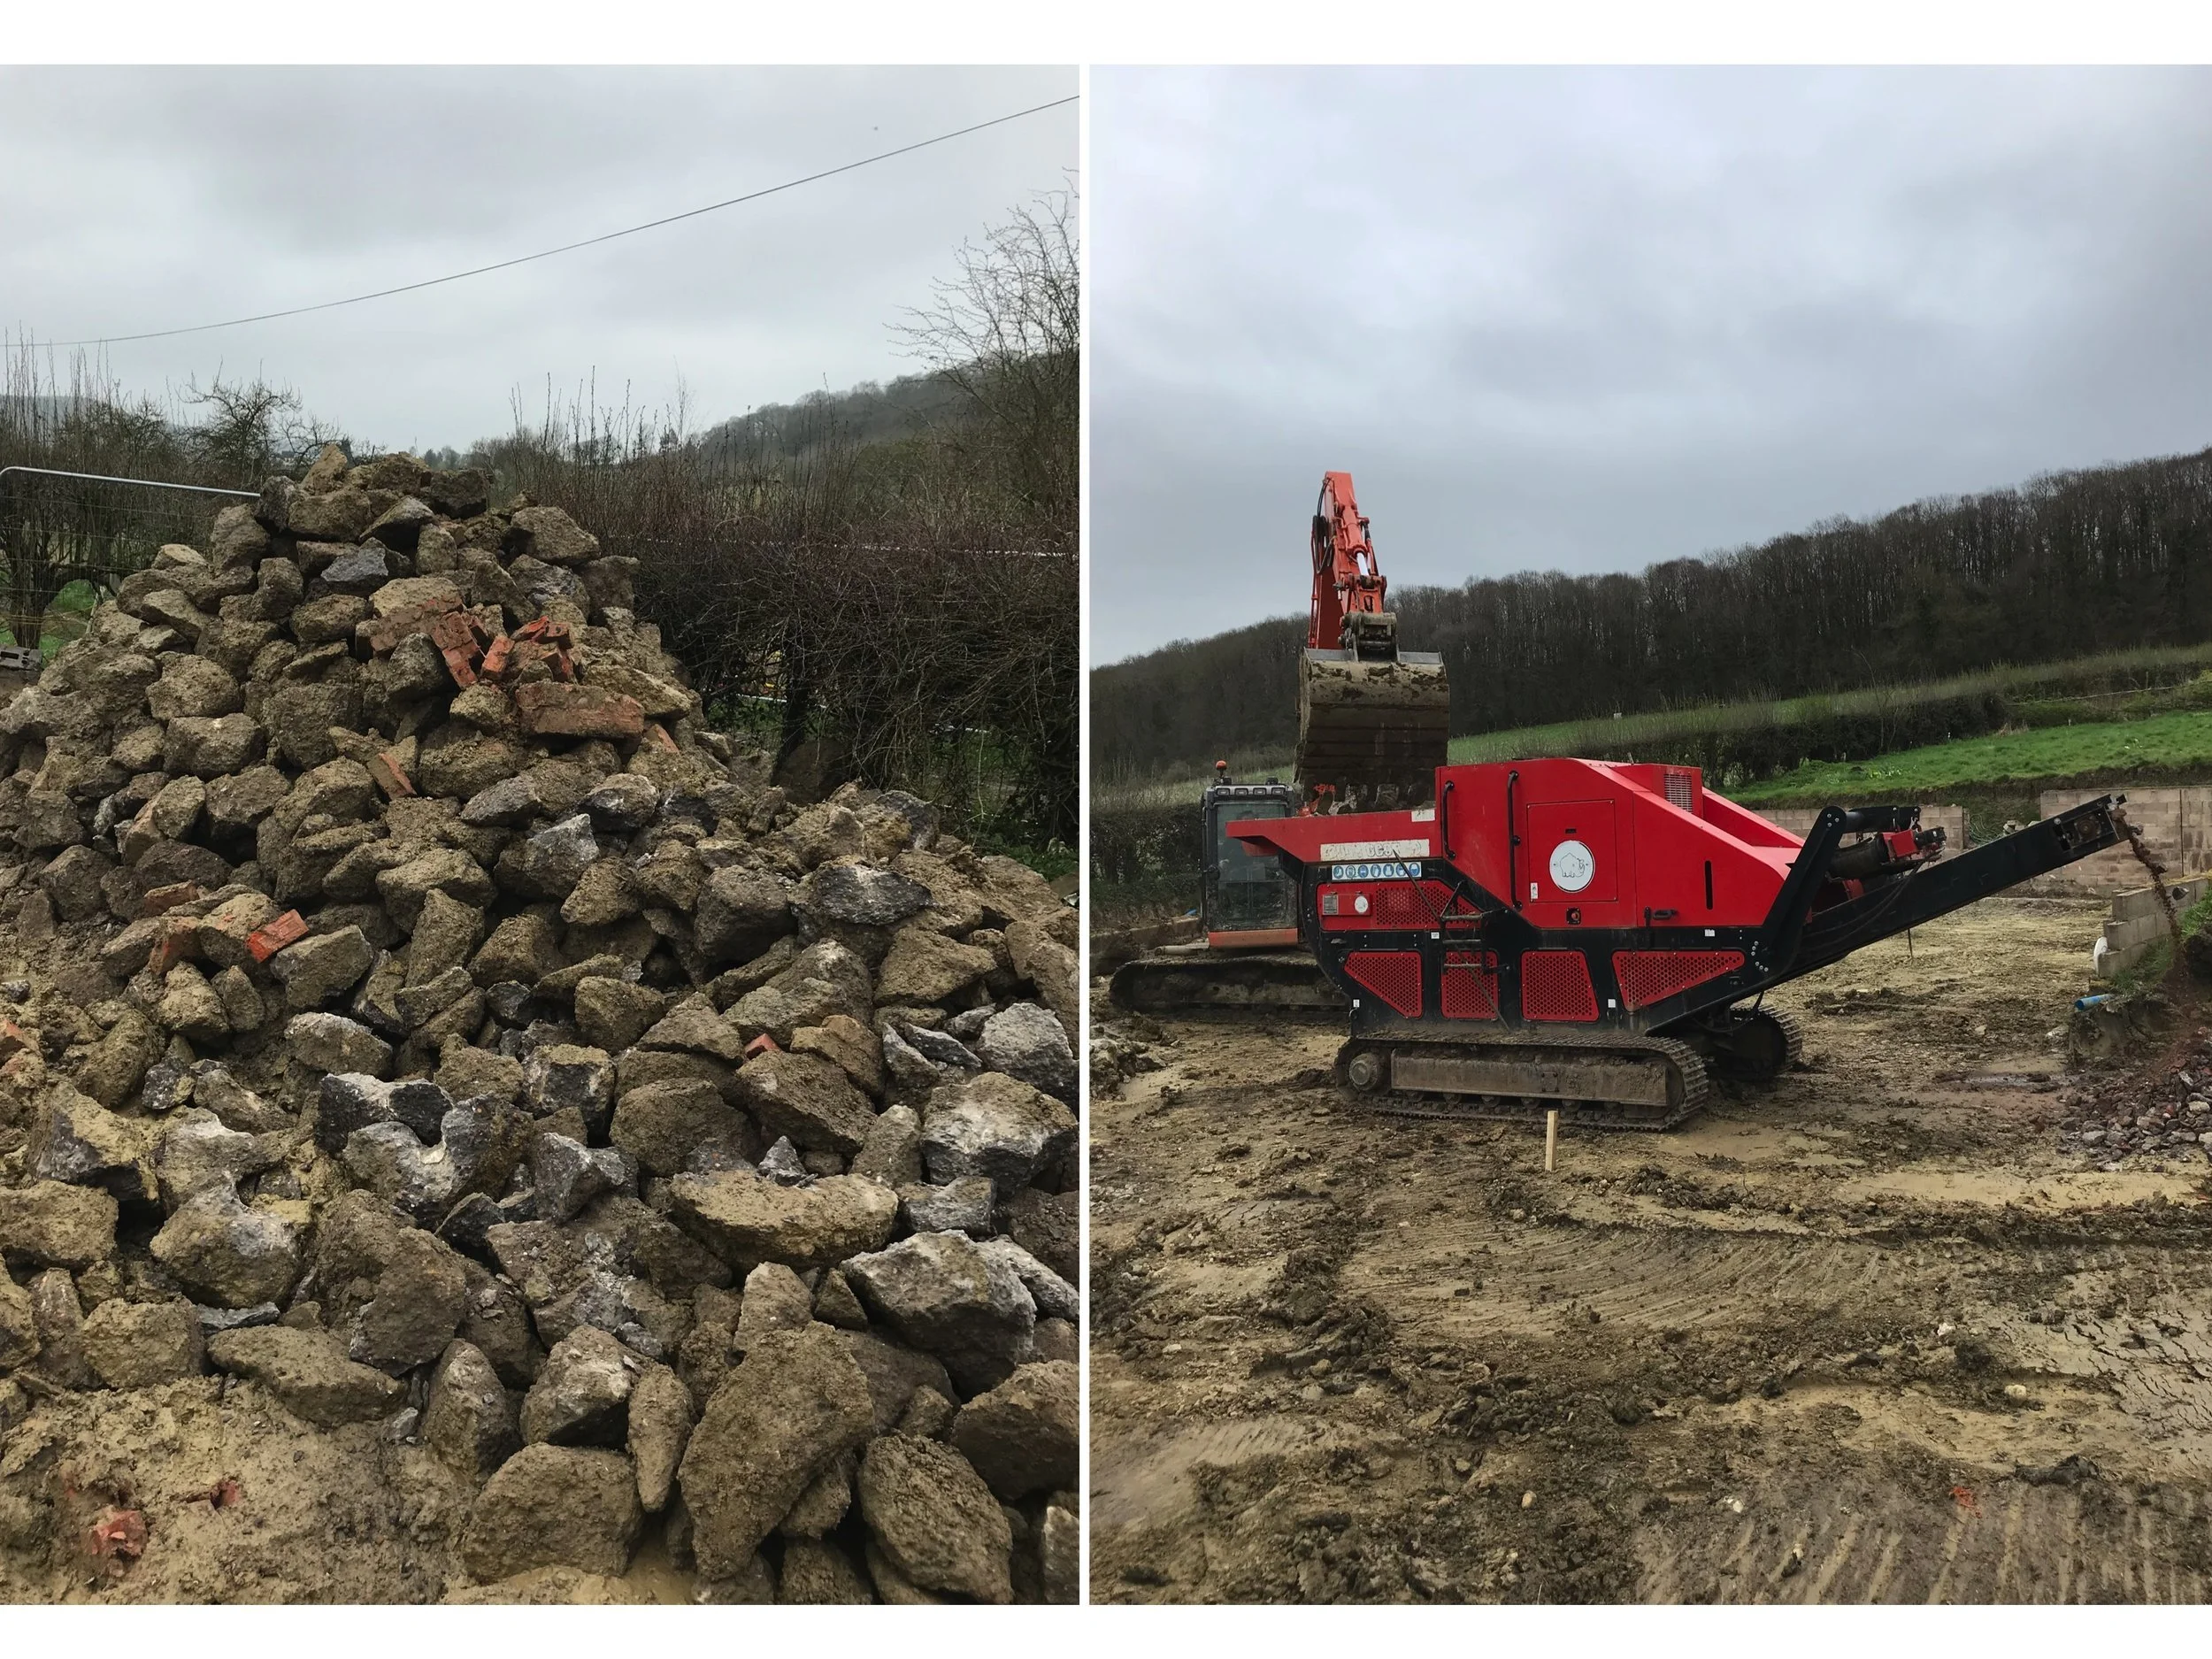
The original foundations were broken out of the ground, crushed and recycled as part of the sub-base for the new, insulated foundation slab
Being near the bottom of a valley, a lot of water drains through the site. Connecting existing land drains uncovered when preparing the foundations to the new ones to be installed was thus vital, as was installing additional ground drainage pipes to replace non-functioning existing ones and to improve overall drainage: see the lower pair of pictures below – no water is flowing from the original blue drainage pipe but it is coming through the wall that this pipe is supposed to protect!

The existing surface water drainage was inadequate, as shown by the yellow arrows (water is leaking through the retaining wall and is not passing through the drainage pipe behind it). Connecting existing drains and instaling new ones was an important part of the initial ground work
In addition to the old crushed concrete foundations, a large amount of new crushed stone was brought in to form both a solid base for the foundations and a drainage field for surface water, with a layer of crushed granite laid on top to provide a level base for the Isoquick ground floor insulation, as shown below.

We used the crushed concrete from the foundations already on the site and a large amount of new crushed stone to make a firm bed on which to lay the sub-floor insulation and the slab foundation for the house
Sub-floor insulation enveloping the concrete slab
The Isoquick foundation system is a bespoke construction of interconnecting expanded polystyrene blocks quickly assembled, and with minimal waste, by a small team. Expanded polystyrene is used in a wide variety of settings including major civil engineering projects.
Using the Passive House Planning Package it was possible to determine that we needed 250mm of this Isoquick insulation below the ground floor concrete slab to provide sufficient insulation to meet the Passivhaus standard.
This was installed over a damp proof membrane on top of the levelled crushed granite layer itself on top of some 70 tons of crushed stone. The Isoquick system consists of horizontally interlocking blocks of expanded polystyrene with a surrounding upstand to contain the yet-to-be-laid concrete slab (in our case, also 250mm thick). The installation - which took less than one day, and is a bit like building with Lego - is shown in the first two pictures below.
The third picture below shows the ‘egg crate’ surface of the Isoquick polystyrene blocks that interlock with each other to prevent horizontal movement thus creating a rigid insulation-cum-support system for the concrete slab. The surrounding upstand of the Isoquick expanded polystyrene system insulates and supports the house’s reinforced concrete foundation slab, and the base outside the upstand provides insulation under the external rain screen wall (in our case to be built of brick).
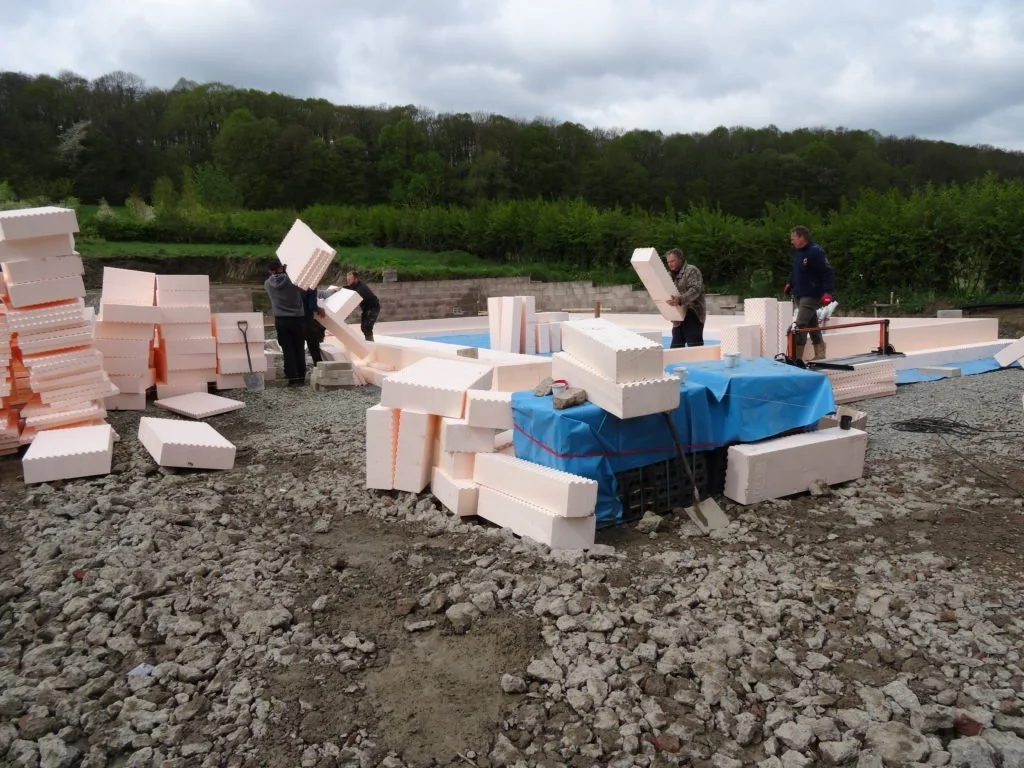
The Isoquick blocks have minimal waste because they are bespoke for each project. They are also lightweight and simple to fit together
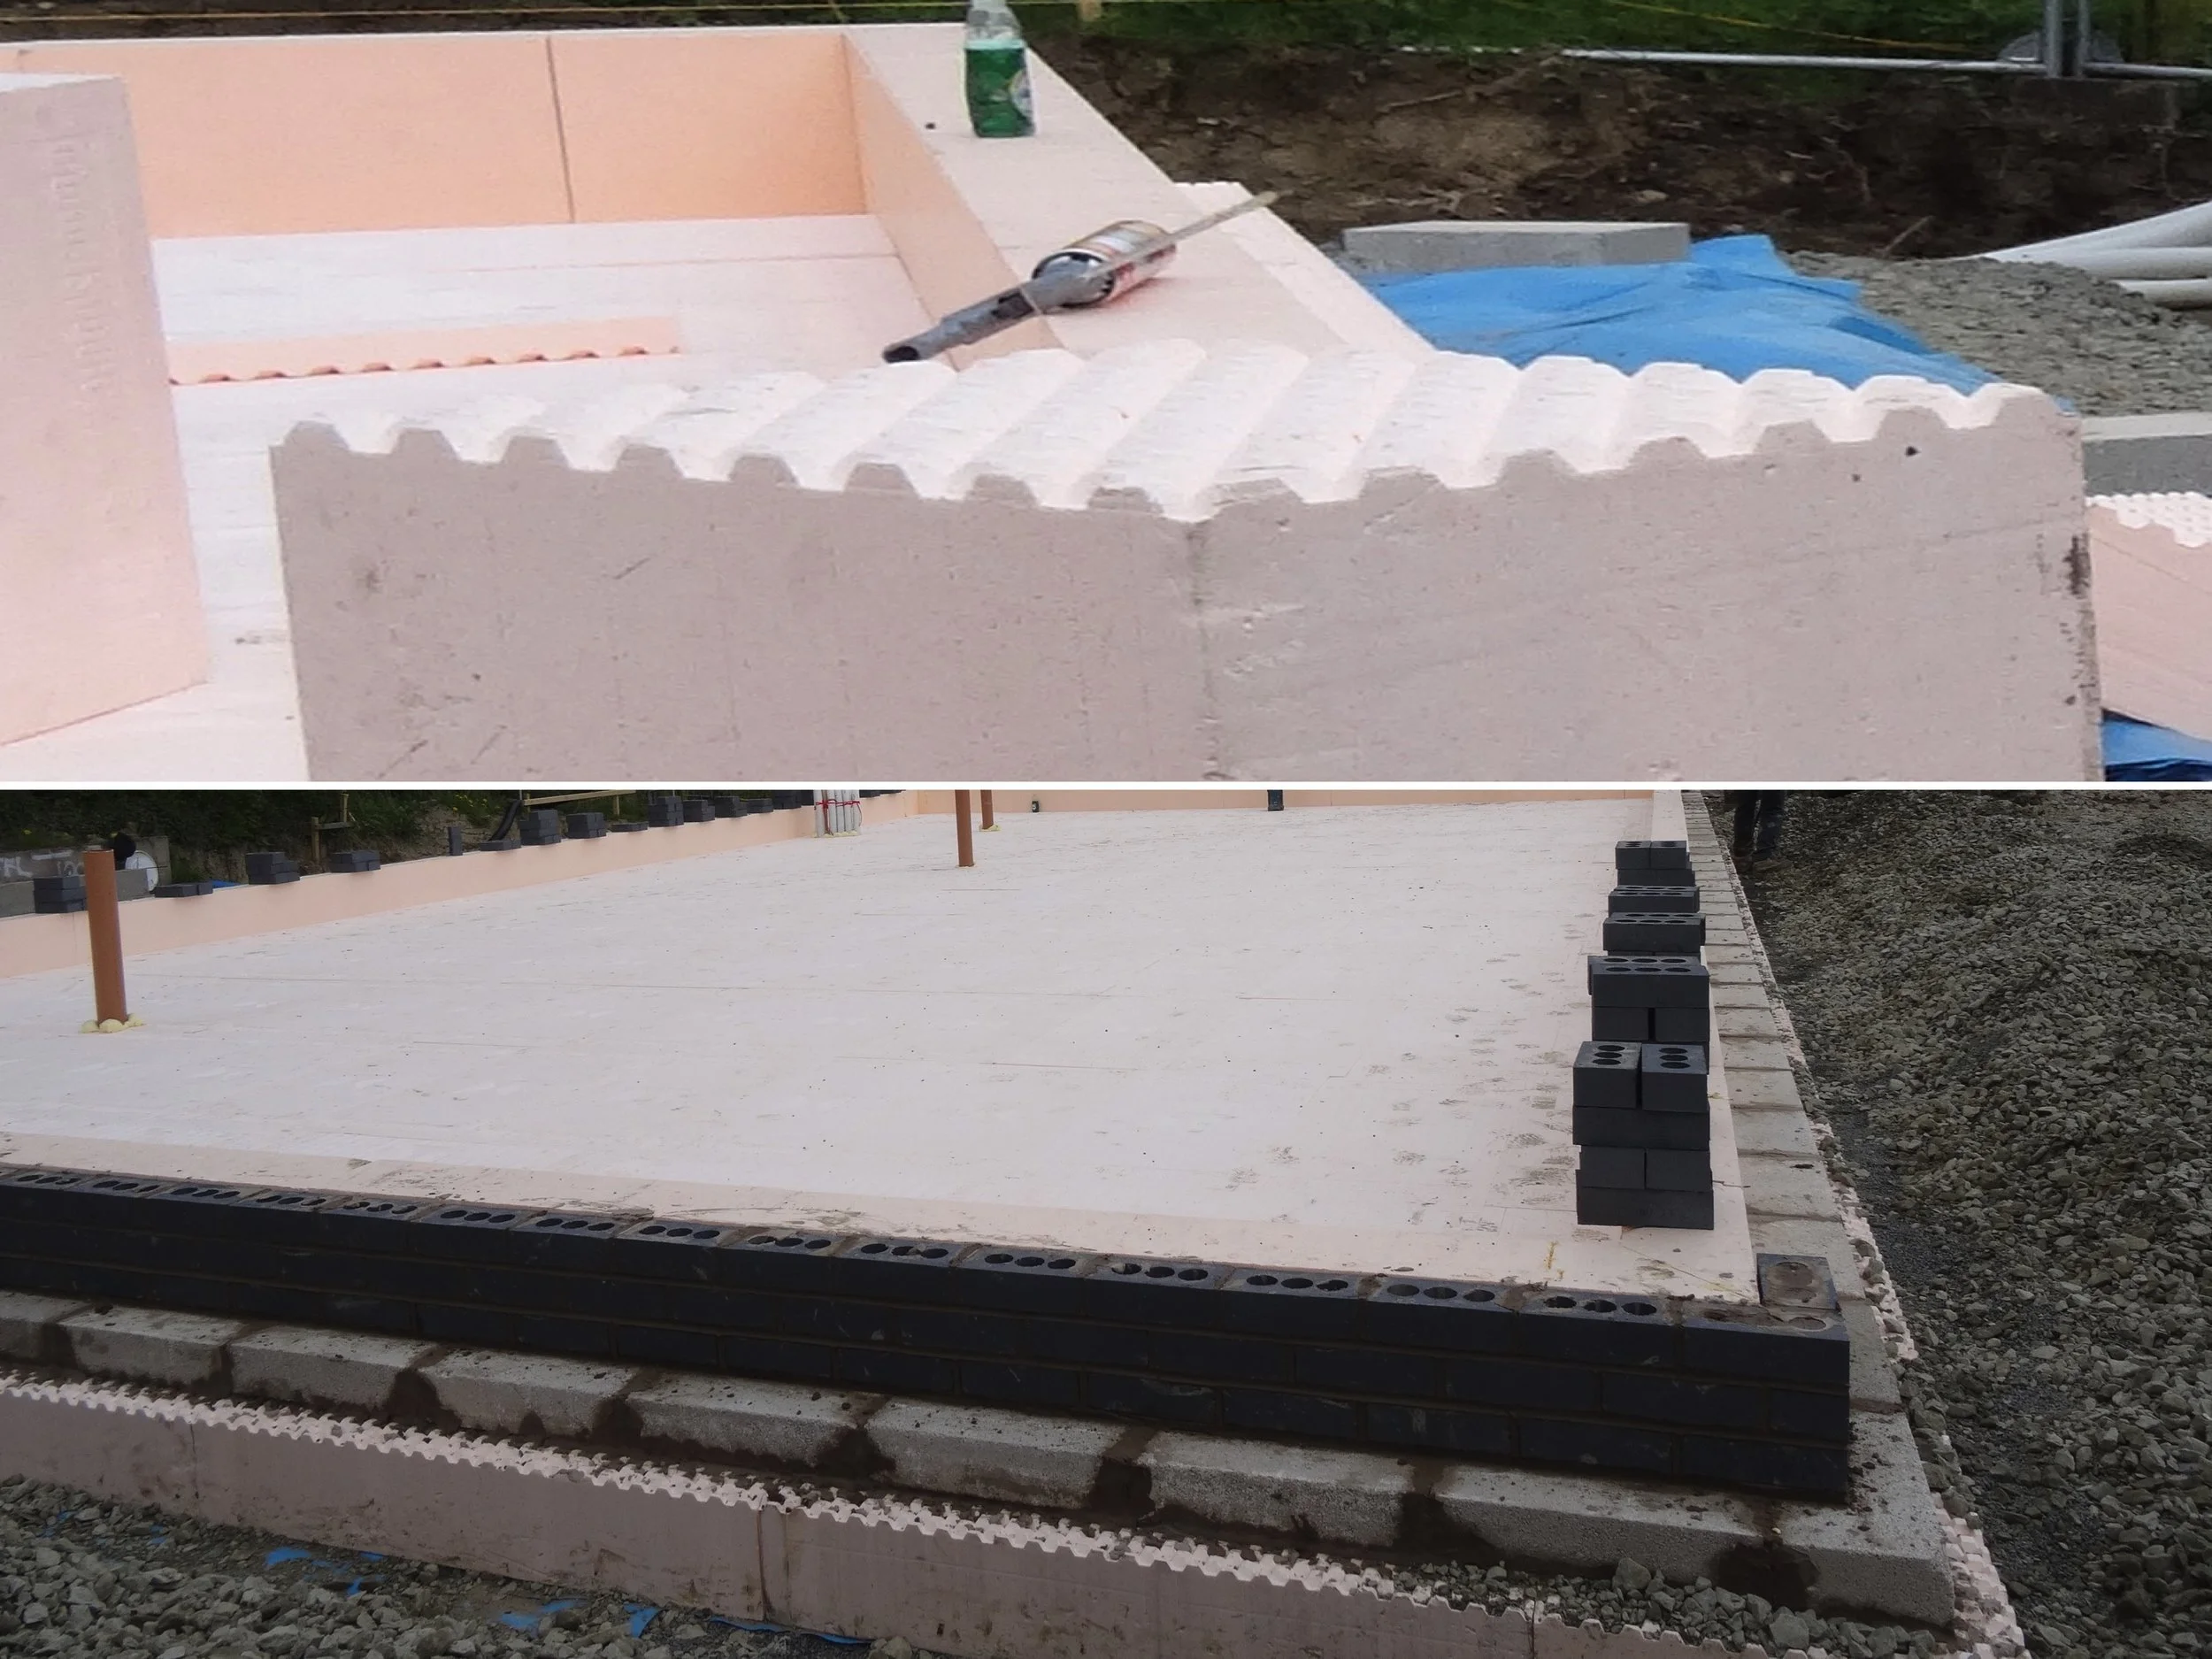
Internally, the egg crate surface of the underfloor insulation creates a rigid structure. On the outside, this egg crate surface creates a suitable surface for mortar to hold concrete blocks and then several courses of engineering bricks as the foundation for the ground floor brick rain screen
The next job was to install a substantial steel reinforcement cage within the upstands of the insulating polystyrene, designed by a structural engineer. In the picture below you can see the general steel reinforcement and the additional steel ‘cages’ to provide greater strength to the slab where it will directly support the house’s oak frame.
Our structural engineer had to take account the underlying soil (dense, sticky clay), nearby trees, the point loads of each vertical beam of the oak frame, and our future-proofing plans for a possible lift big enough to take a wheelchair sited in the hall. You can also see that our builder laid an additional damp proof membrane between the Isoquick insulation layer and the concrete slab.
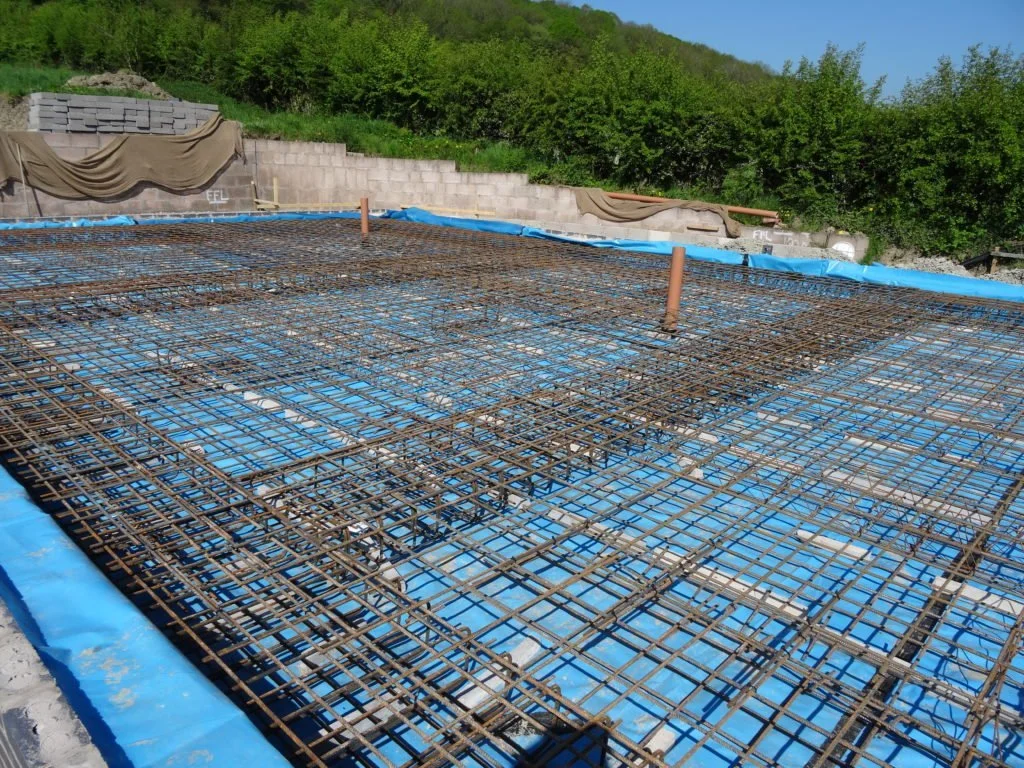
There is a lot of steel reinforcement for the concrete slab about to be poured, with extra strong ‘cages’ to support the weight of the house to be transferred through the upright oak beams
The left-hand photograph below shows the poured concrete slab in situ with engineering bricks laid to take the outer brick rain screen following erection of the oak frame and the insulating encapsulation system.
Also visible in this photograph, at the front of the house, is the first of four excavations for the strip foundations for the two balconies, these being shown on the right. The purpose of the balconies – of which more in another post (see the ‘Running a Passive House section)– is primarily to shade the large south-facing windows to prevent overheating in the summer
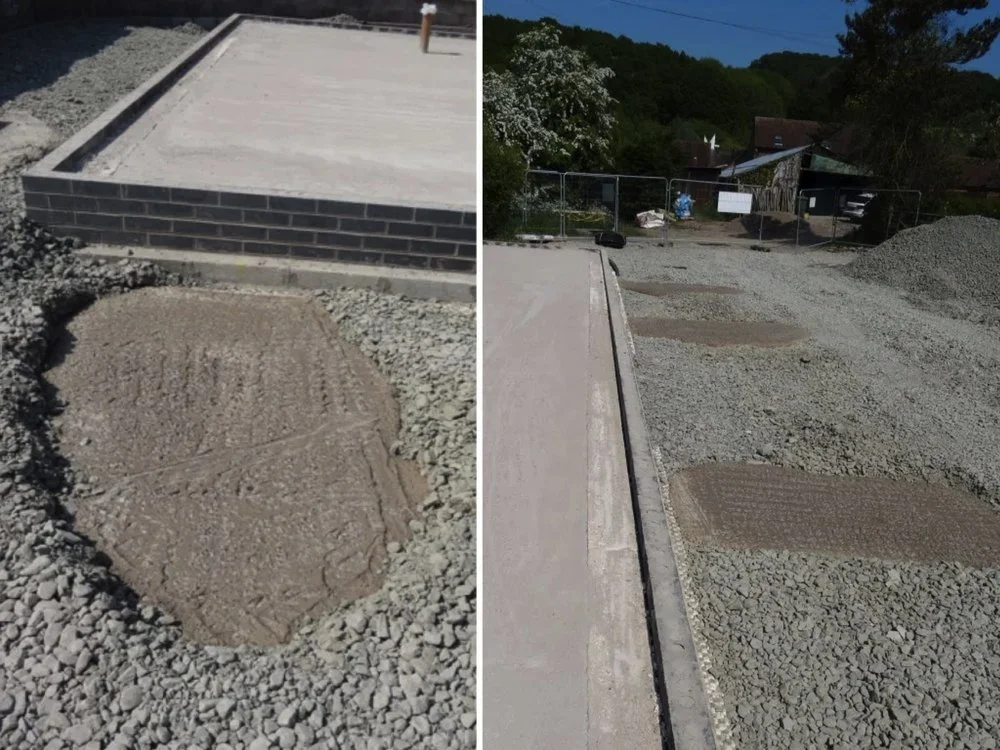
The concrete slab drying before the erection of the oak frame

We also installed solid concrete foundations for the two oak frame balconies at front of the house