Hard landscaping

This post is about finishing the surfaces of the retaining walls, patio and parking area, and (although, strictly speaking, it’s soft landscaping) recontouring the land adjacent to the house. We planned the main aspects of all of this from the beginning; doing so in advance is important from both design and cost perspectives.
We describe the groundwork preparation of the existing ‘horseshoe’ retaining wall and the creation of a patio area and a complementary shorter horseshoe retaining wall in an earlier post. We chose quarried stones to dress these walls, and sandstone flagstones to cover the patio and the area surrounding the house. And we laid the parking area with resin-bound gravel. These latter two surfaces are part of our external permeable-surface sustainable drainage system; one of our planning permission conditions being to design, and implement, a sustainable surface water (or ‘SuDS‘) drainage system.
Cladding the retaining walls
Our site had previously been excavated so a two-story house with ridge height acceptable to our planning authority could replace the original bungalow there (you can see a bungalow similar to the one on our site on the right in the picture below). This excavation required a horseshoe-shaped retaining wall to support the ground beyond. You can see part of this wall in the picture below, taken from what was to become our patio and looking towards part of the foundations of the previously planned two-story house.
We sought to echo this horseshoe retaining wall in a shorter retaining wall for our patio (which also required excavation). You can read about the groundwork preparations of these areas in an earlier post.

Part of the ‘horseshoe’ retaining wall where the valley side had been dug into to allow building of a two-storey house. We thought long and hard about how to cover the building block retaining wall and settled on using quarried stone
The pictures below show different stages of the stone cladding being applied to the reinforced blockwork retaining wall shown above and to the steps to the patio. We chose Gloucester Green sandstone blocks to dress the retaining walls from a quarry. And we used the same stones for a cock ‘n’ hen capping to the walls, which is a common style in Malvern. The stone cladding stones are big and very heavy; our builder added foundations to the original horseshoe wall to support them.
Also shown in the top right picture below are stone ‘slips’ used here for the front of the steps, and also on the far side of the horseshoe wall to avoid it looking disproportionately thick. Slips are thin strips of stone cut by the quarry to provide a ‘rough’ face giving the appearance of a full-thickness stone when grouted.
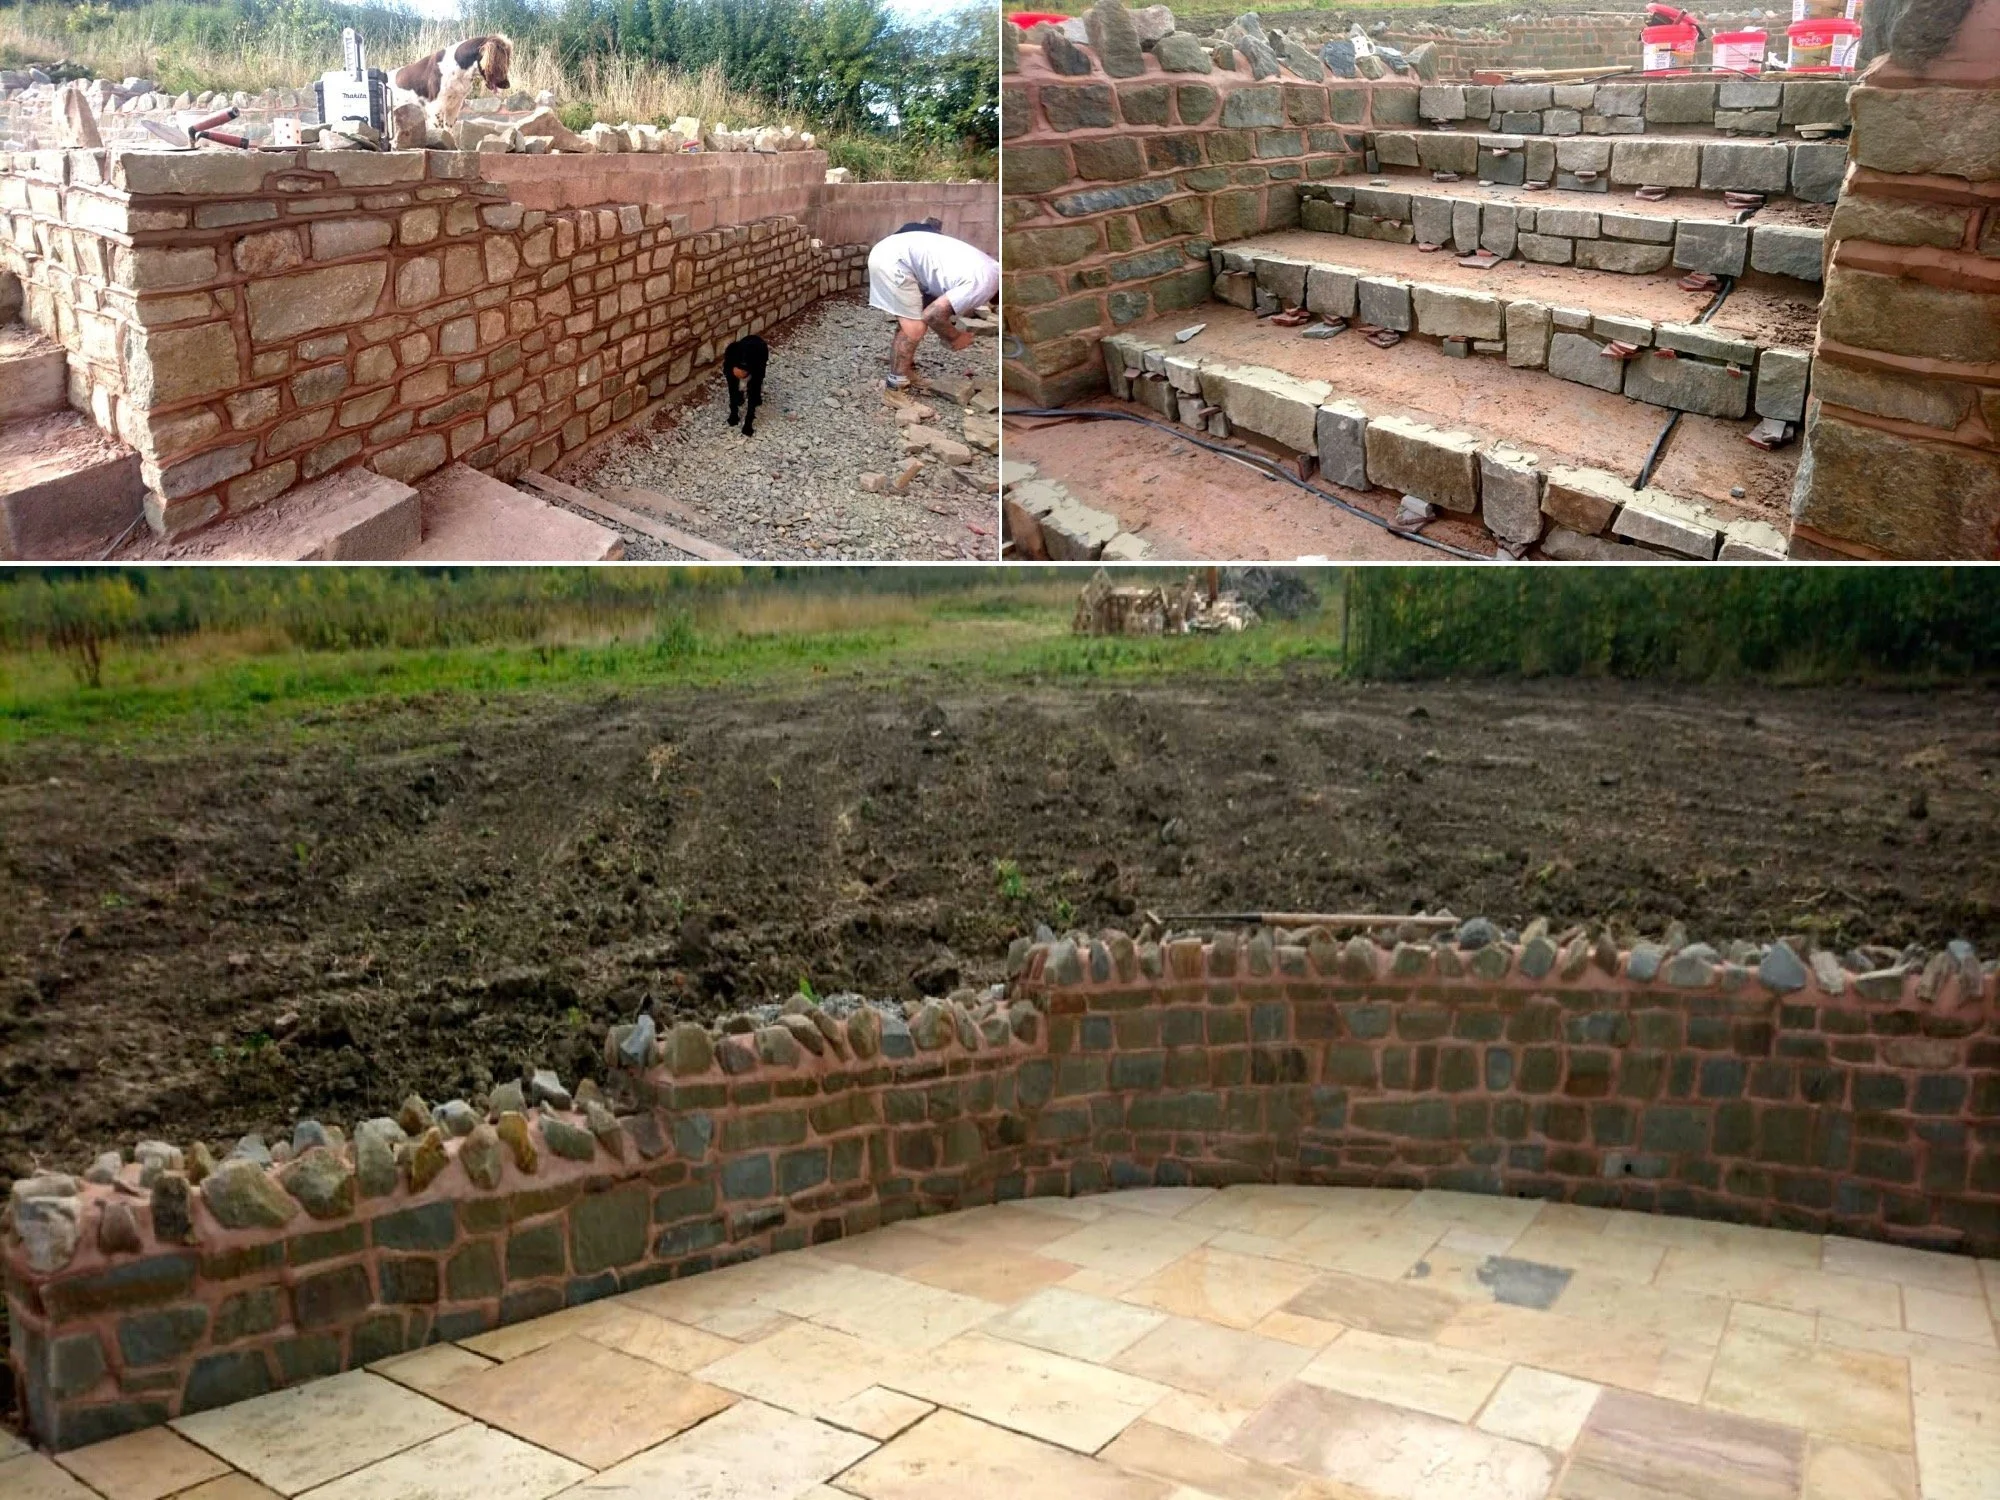
Different stages of cladding the retaining wall with Gloucester Green stone. On the steps and the far side of the wall we used slips to give the impression of solid stonework but without the bulk
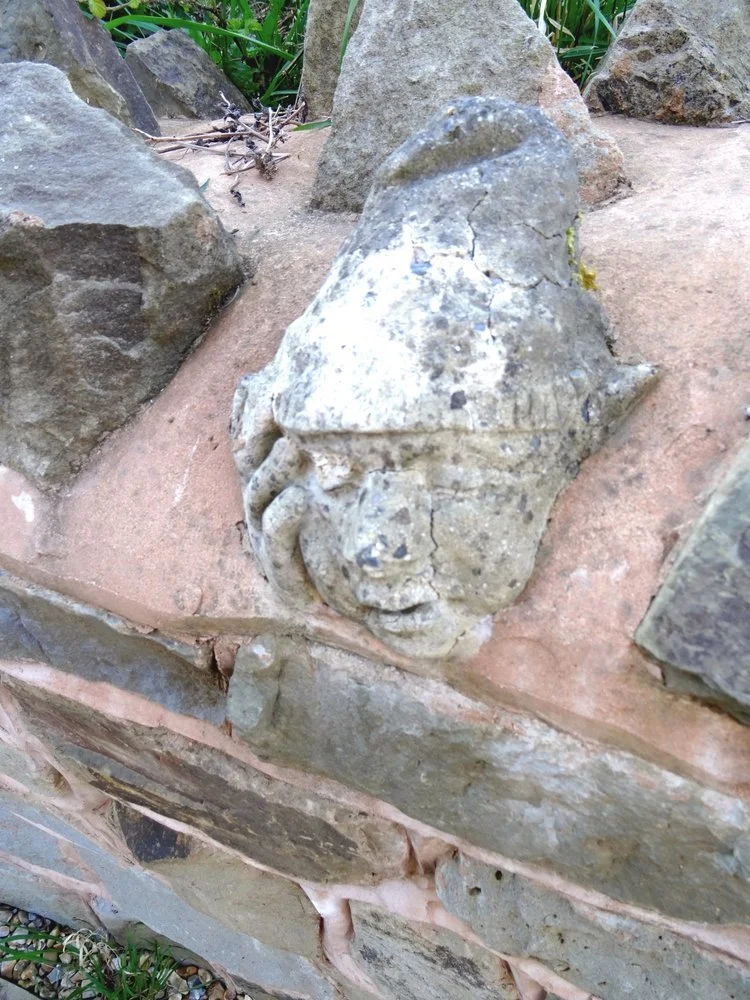
We were also rather taken with our builder’s sense of humour with the capping for the retaining walls. Amongst the detritus on the site from the original bungalow he found a gnome’s head and tentatively set it on top of one of the walls. We loved it so it stayed, but we are still not sure if he having a ‘Doh!’ moment or is just asleep.
This, and the idea of the cock ‘n’ hen capping stones, are examples of why a good relationship with your builder can be so important. We were unsure what sort of capping or coping stones or other dressing to use for the top of retaining walls. Our builder, Furber Young Developments, suggested the cock ‘n’ hen style and set a number of stones on the top of the wall for us to consider. Had we not liked this they would have been easy to remove. As it was, we considered that this was exactly right and we are delighted with the result.
Flagstones for the patio and the area around the house
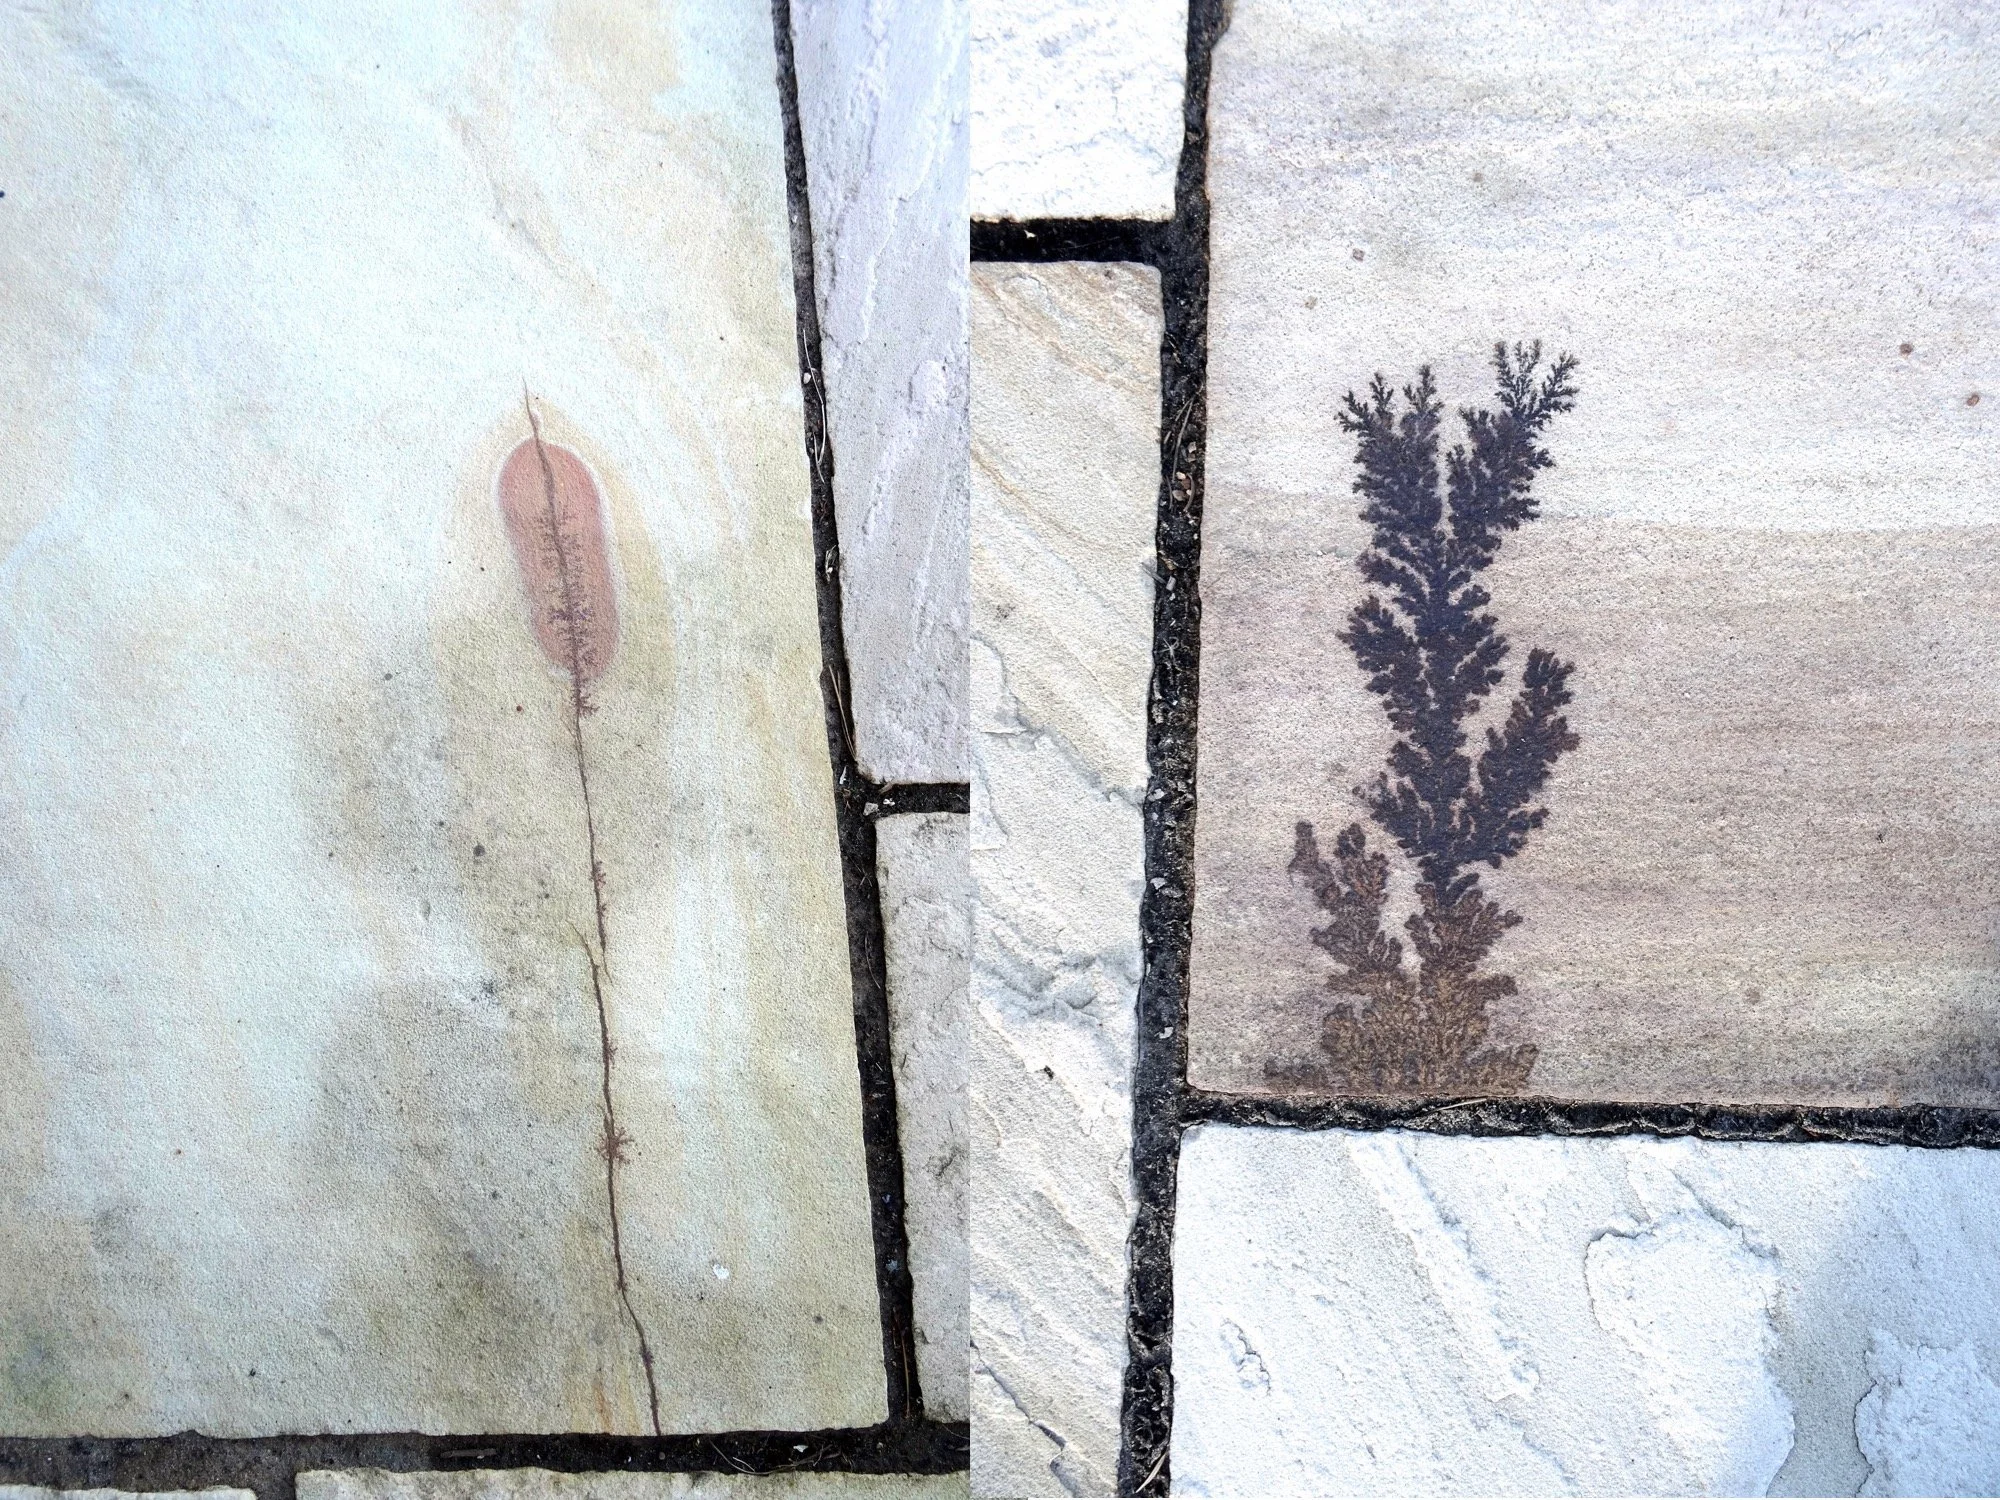
We chose Indian sandstone flagstones called Fossil Buff to pave the patio and the area around the house. We didn’t realise from the supplier’s brochure, or from samples of laid stones at a builders’ merchant, that our Fossil Buff stones would contain real fossils – two are shown below. Whilst many building materials are ‘old’ it’s nice to know that some of ours are demonstrably pre-historic.
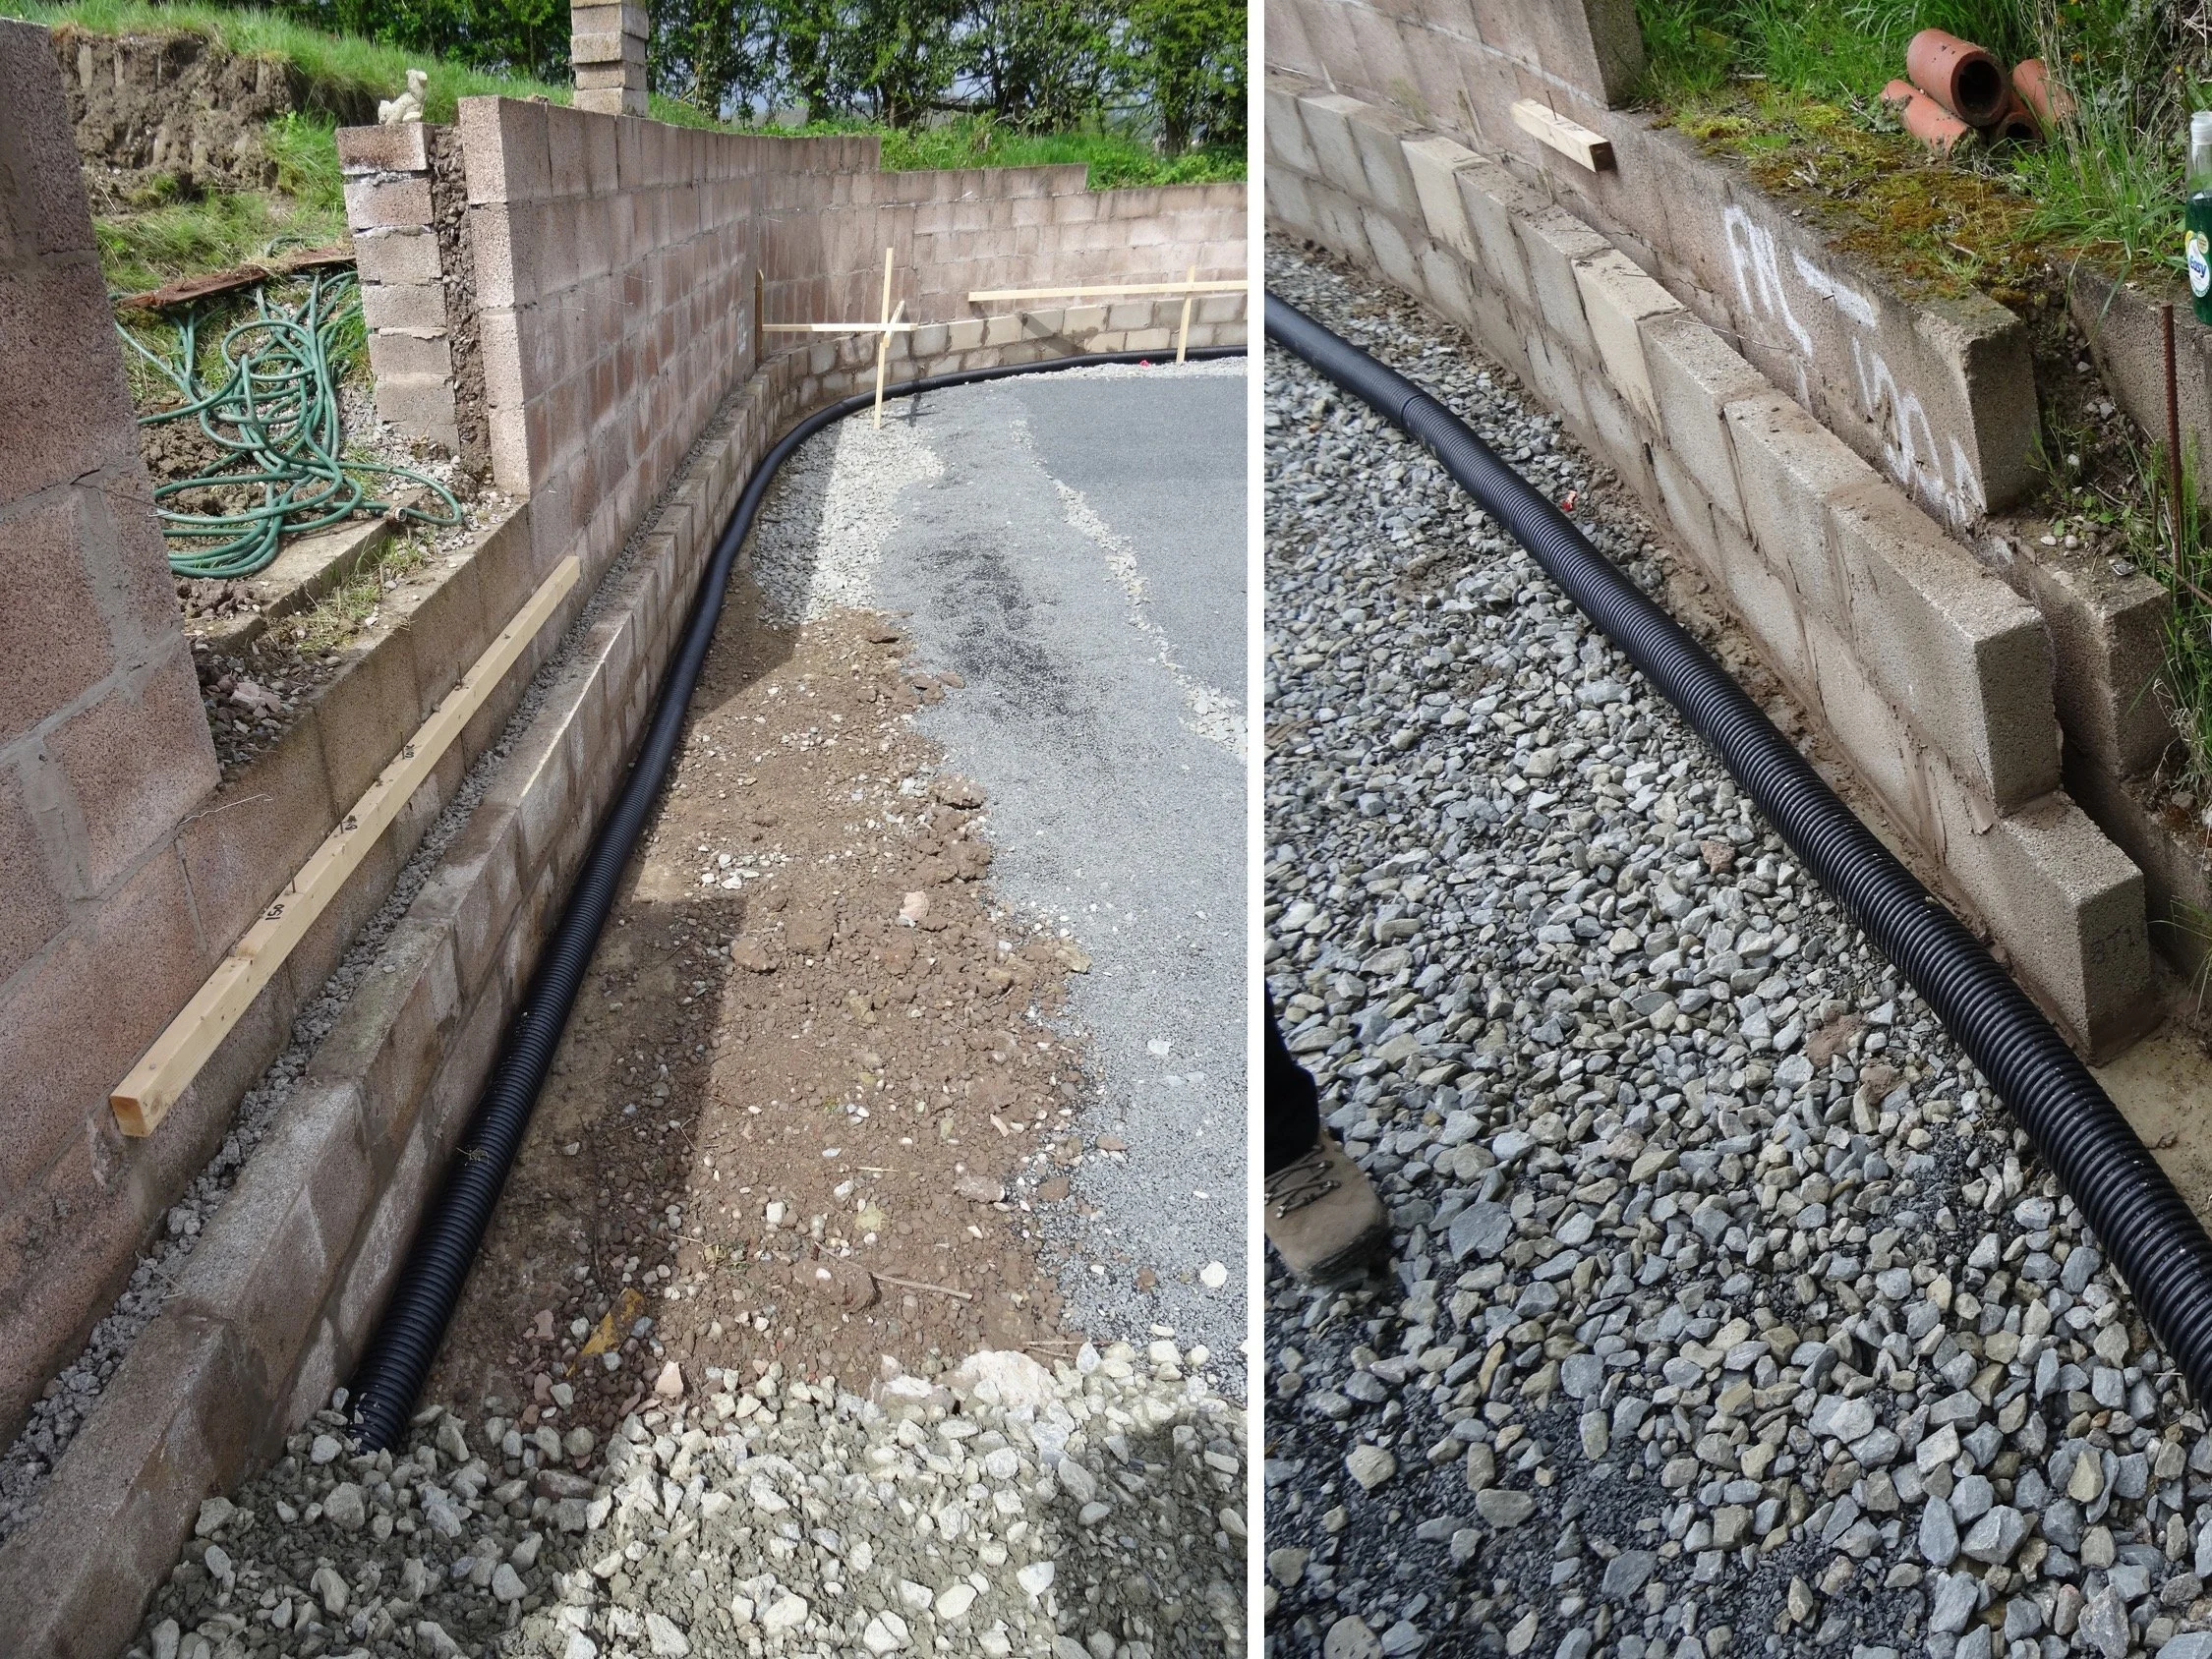
Part of the preparation for the patio and areas around the house included laying surface water drainage pipes around the edges of all these areas and the house itself, with everything sitting on a large quantity (about 90 tonnes) of crushed stone to aid drainage. In pictures below you can see examples of these black perforated drainage pipes at the base of the horseshoe retaining wall. The flag stones were set a short distance away from the walls and the gaps (over the drainage pipes) were filled with gravel. In addition, the mortar between the flag stones is permeable as part of our sustainable drainage system. This drainage system works brilliantly and we do not get any standing water.
The two pictures directly below also show the building blocks added in front of the original retaining wall as foundations for the stone cladding (referred to above). And the picture below these shows the finished article: the flagstone edges were finished with gravel edging which overlaid the perforated drainage pipes laid around the edge of the paved areas and around the house foundations.
Crushed stone used as foundation for flagstones around house and as part of a sustainable drainage system
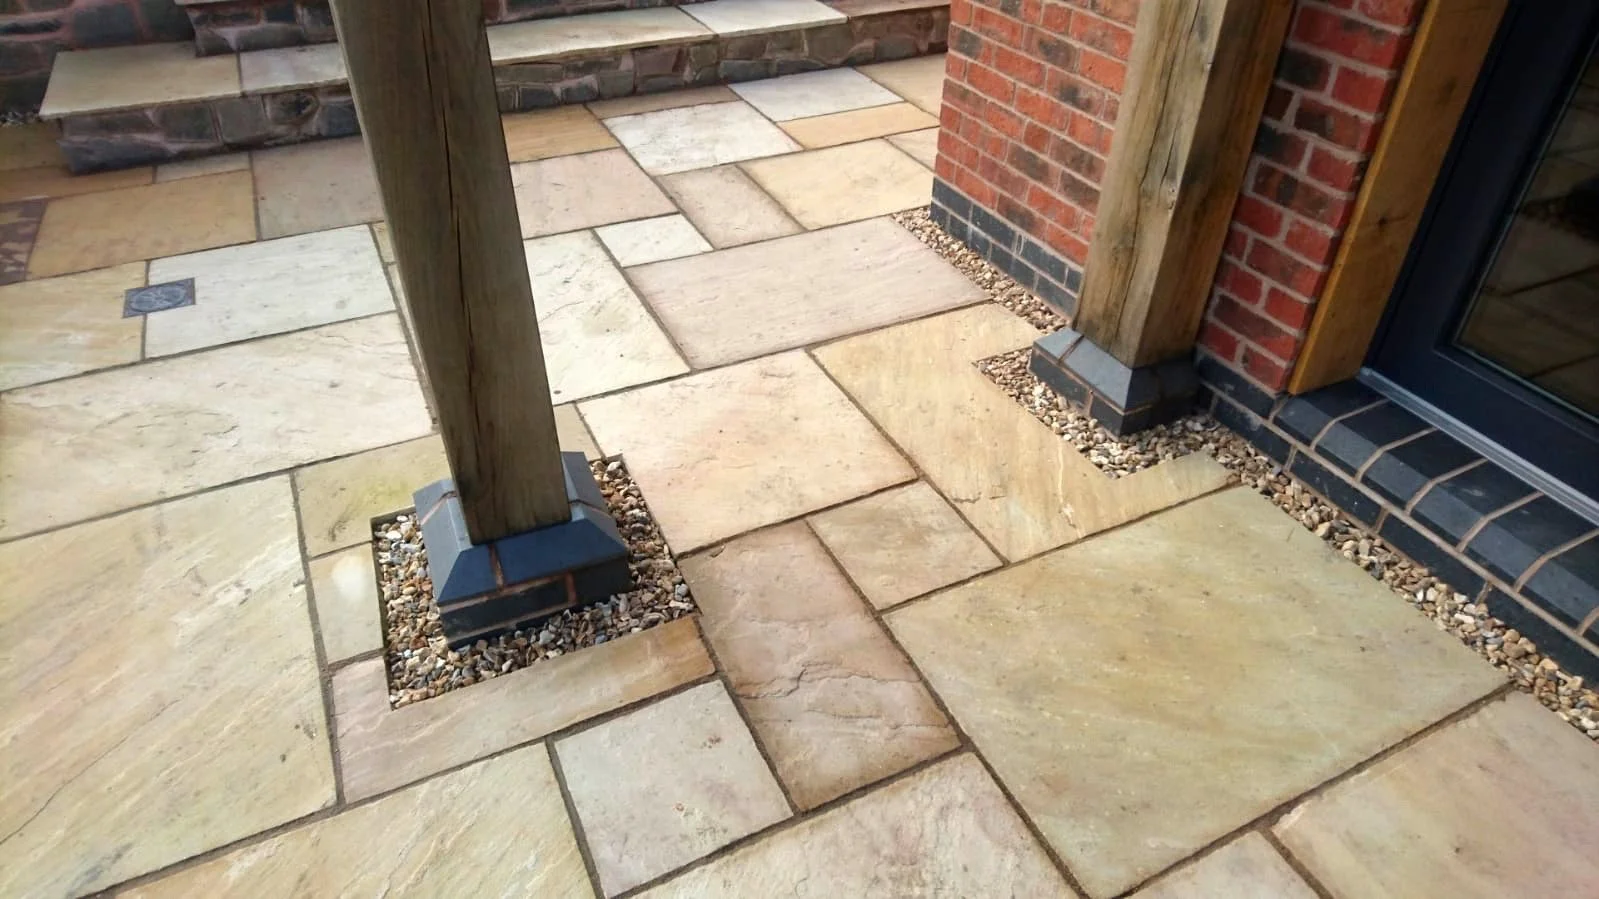
Gravel was placed at the edges of the flagstones around the house and on the patio to aid drainage: in most places this is directly above a perforated drainage pipe
Resin-bound gravel for the parking area
We like the appearance of resin-bound gravel. And it’s maintenance-free, and enables sustainable drainage as demonstrated in the short video on the right showing how porous this drainage system is: heavy rain just disappears immediately.
The diagrams below, from our SuDS drainage design, show (above) a short below-ground retaining wall between the parking area and the adjacent bridle path, and a fin drain to collect the water draining through the whole area including the patio and around the house. You can see this fin drain in the picture below.
The lower diagram shows the structure of the parking area with a binder layer of porous asphalt beneath the resin-bound gravel top layer.
The pictures below show the construction of the parking area. At the top is the sub-layer of crushed stone, part of the crushed stone layer under the house and patio area. Bottom left can be seen the 300mm-deep fin drain and the pipe from it leading to the main surface water drainage system. Bottom right, you can see the porous asphalt under-layer.


Recontouring the surrounding land
Strictly, this is more appropriately described as soft landscaping. However, it was an integral part of the hard landscaping and required moderately heavy machinery to change the slope of the surrounding land pretty extensively to complement the height of the retaining walls (which we reduced to improve the views from the downstairs bedrooms) and to create parking area with an almost imperceptible slop from the previously steeply-sloped field.
The pictures below show before (top) and after (bottom) views of the patio (left) and entrance/parking area (right). The top left picture shows that the original ground beyond the excavated patio area was higher than the new retaining wall. As shown in the bottom left picture, this was re-contoured to gently slope up from just below the top of the new retaining wall to the hedge at the top of the garden area.
The top right picture shows the original entrance to the field adjacent to the building plot. This sloped all the way from the bridle path to the top of the valley. As can be seen from the bottom right picture, the tree and original gate post were removed and the area made almost horizontal for a parking area with a gently sloping field from here to the top.
Furber Young graded the ground very effectively to create this parking area with a very gentle slope (facilitating surface water drainage in addition to its porosity) and a similarly gentle slope of the ground beyond up the valley side. The effect was to reduce the height of the adjacent area of field such that the end result looked as if it had always been like that. Ensuring that your builder understand what it is that you want and is able to deliver this is important in getting your desired result; after all, you’ll be living with it for a long time! We are delighted with what Furber Young Developments did for us.
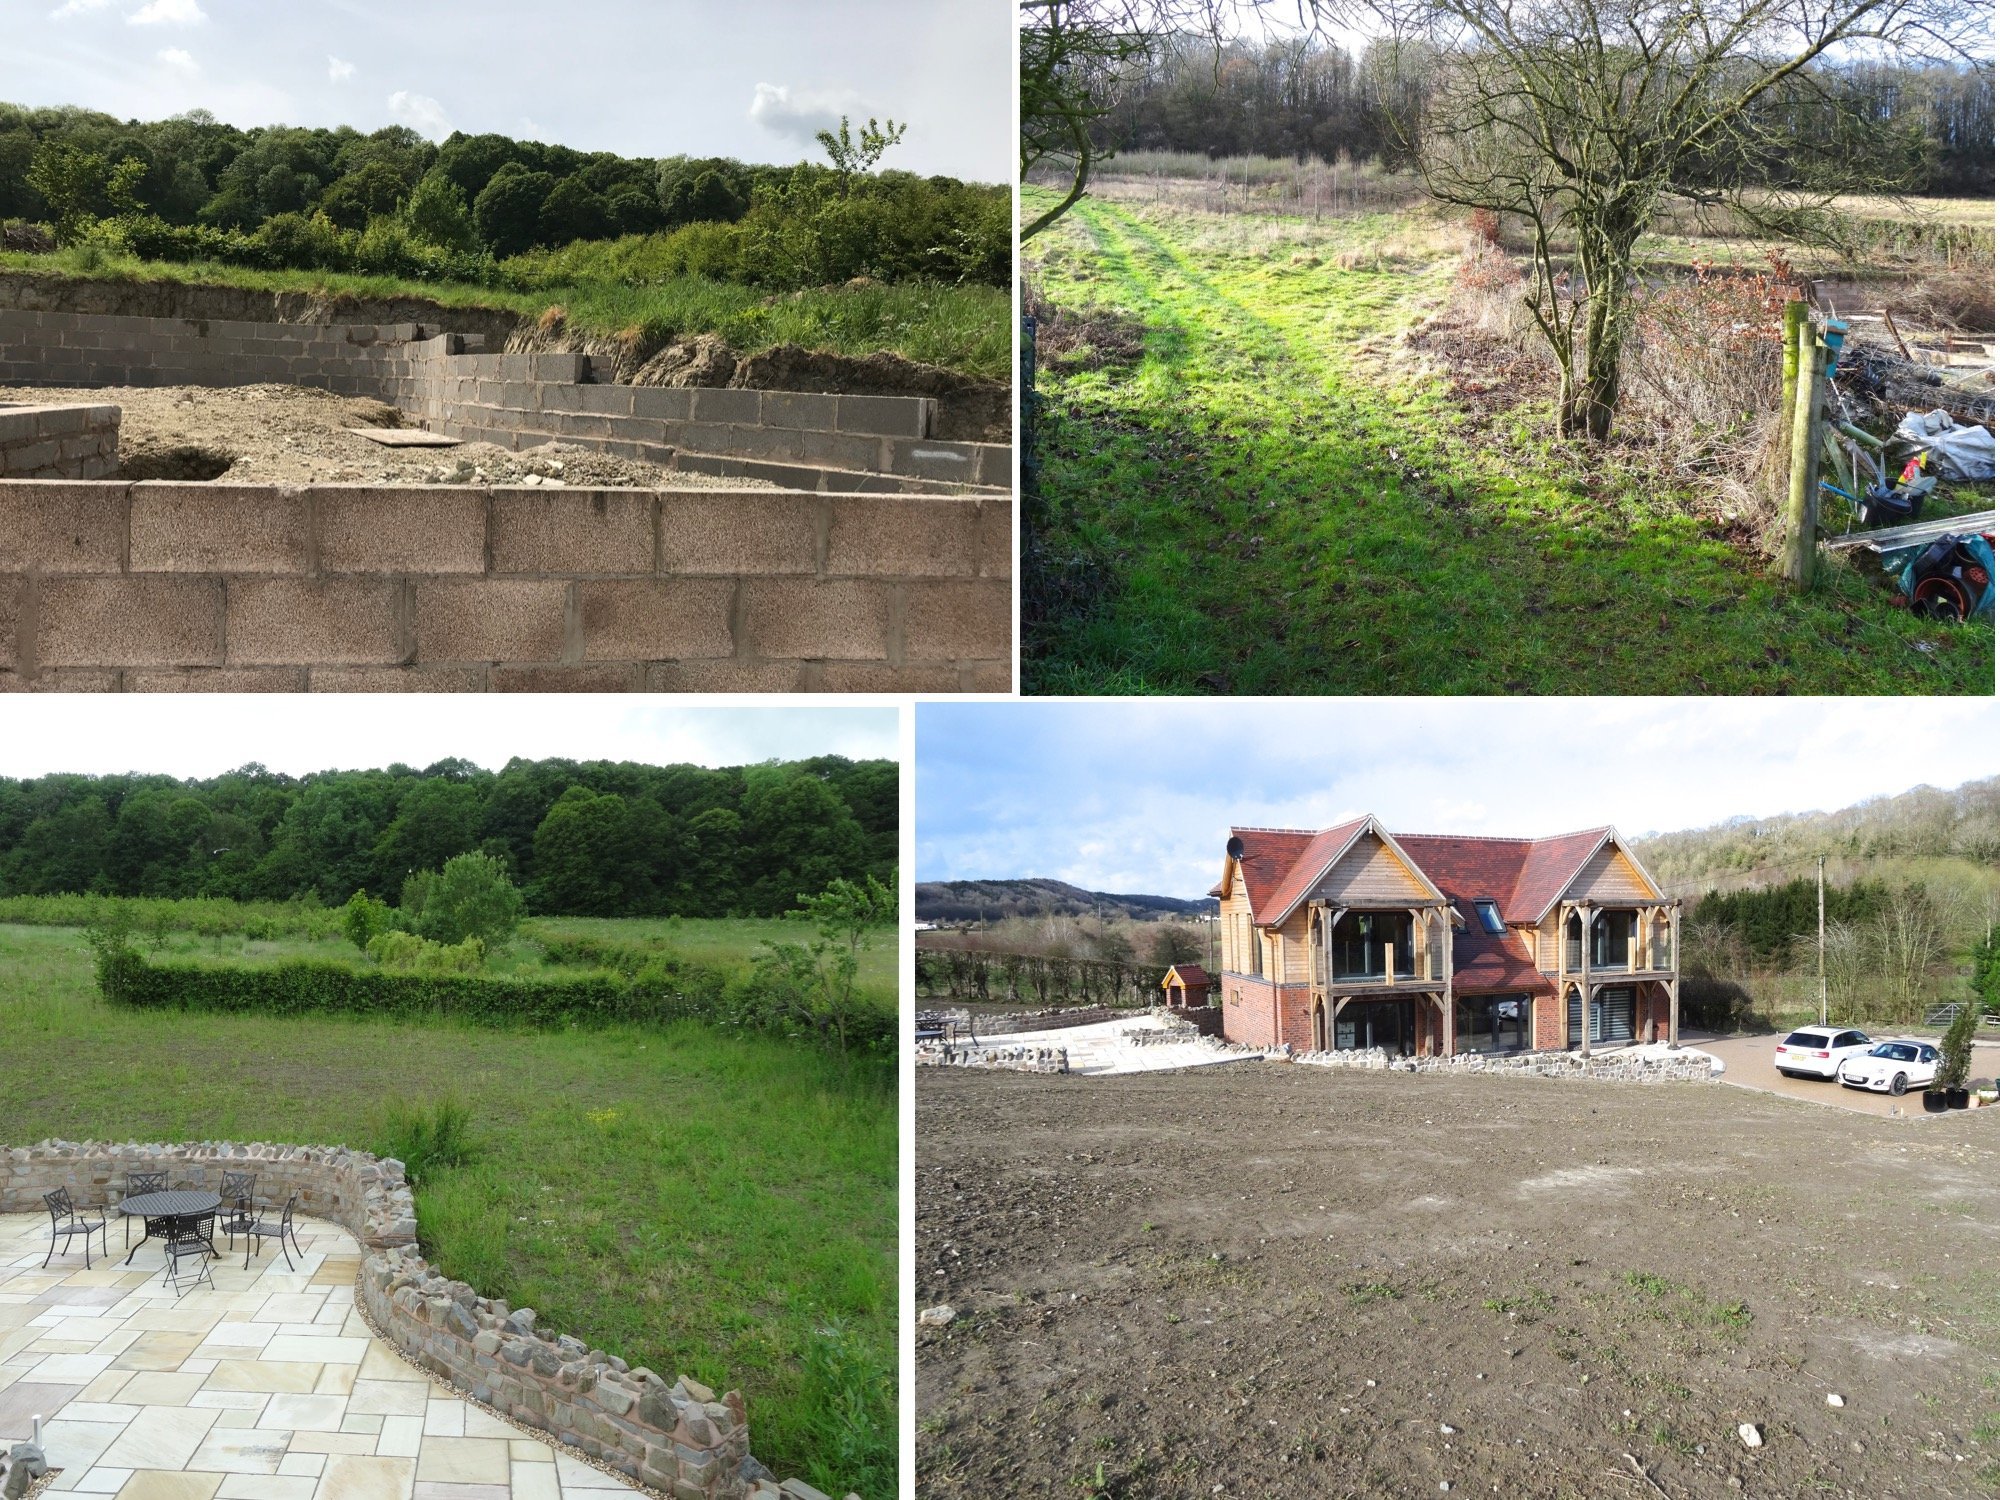
Before and after land contouring. Our builders made a fantastic difference that, afterwards, looked like it had always been that way